
Project Management
In the previous chapter you learned more about the financial management of projects, based on Odoo ERPOnline's analytic accounts, structured into cases. This way of working enables you to analyze time plans and budgets, to control invoicing and to manage your different contracts.
Here we will explain operational project management to organize tasks and plan the work you need to get the tasks completed. All the necessary operations are carried out from the Project menu.
In Odoo ERPOnline, a project is represented by a set of tasks to be completed. Projects have a tree structure that can be divided into phases and sub-phases. This structure is very useful to organise your work.
Whereas analytic accounts look at the past activities of the company, Project Management's role is to plan the future. Even though there is a close link between the two (such as where a project has been planned and then completed through Odoo ERPOnline) they are still two different concepts, each making its own contribution to a flexible workflow.
Most customer projects are represented by:
- one or several analytic accounts in the Accounting System, to keep track of the contract and its different phases,
- one or several projects in Project Management, to track the project and the different tasks to be completed.
There is a direct link between the project and the analytic account, because for each new project created, OpenERP will automatically create the corresponding analytic account in the Projects analytic chart of accounts. Note that you have no access to the analytic account directly from a project.
Creating Projects and Related Tasks
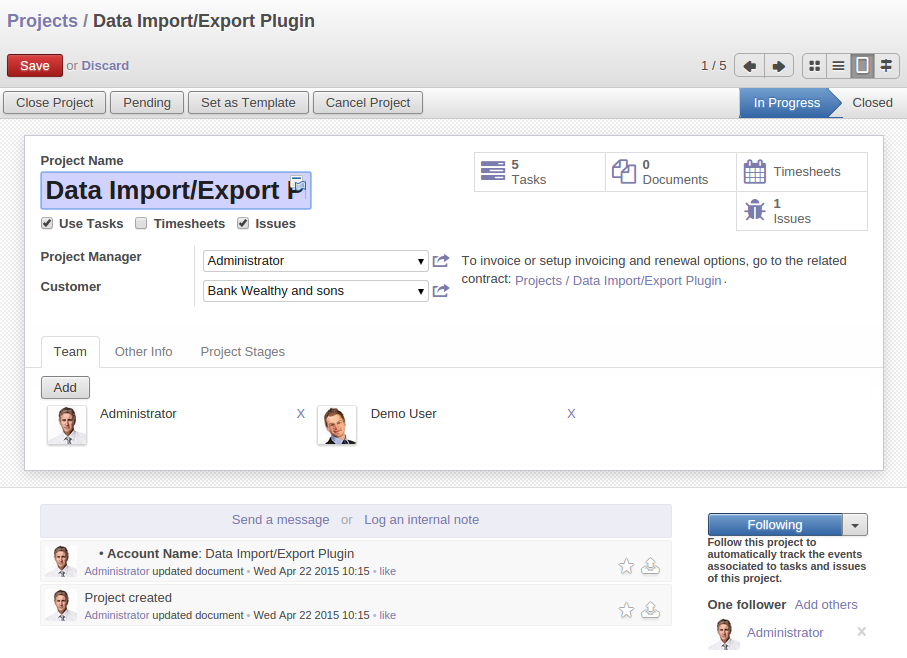
To define a new project, go to the menu Project > Project > Projects. Click Create and give your new project a Project Name.
You can assign a Project Manager and assign your project privacy with Privacy / Visibility.
The Other Info tab displays information about Planned Time and the Time Spent on the project according to the task work completed. Enter the general duration by completing End Date. You can put this project into a hierarchy, as a child of a Parent Analytic Account
In case a project takes too long, it can also be escalated to another project. This feature is available if you have installed the module project_issue, which can be done by selecting Track issues and bugs in the Settings > Configuration > Project. In Project Escalation, enter the project that will be used for escalated tasks. You can also link to a Working Time category, which will be used to calculate the Project's time line, i.e. through a Gantt chart.
The status of a project can take the following values:
- In Progress: the project is being carried out,
- Pending: the project is paused,
- Cancelled: the project has been cancelled and therefore aborted,
- Closed: the project has been successfully completed,
- Template: the project can be used as a template to make projects based on this.
On the Team tab, add Project Members to the project; this is related to access rights too.
Projects
On the project form you find a customer field, which will also be used for invoice creation. To generate invoices based on time spent on tasks, you need to install project_timesheet. Go to menu Settings > Configuration > Project. And in Task, tick Record timesheet lines per tasks. Then Go to the menu Project > Invoicing > Invoice Tasks. Open its form view click on More and Create Invoices.
Complete the invoicing data, such as Sale Pricelist and Customer on Analytic Account before creating the invoice.
Some companies run a system where emails are automatically sent at the end of a task requesting the customer to complete an online survey. This survey enables a company to ask several questions about the work carried out, to gauge customer satisfaction as the project progresses.
This function can also be used by ISO 9001-certified companies, to measure customer satisfaction. Odoo ERPOnline also allows you to create your own surveys.
The Project Stages tab allows you to define stages that help you divide your tasks. You can add a sequence number to set the stage order, allowing you to prioritize your task work, i.e. first you will have the Design stage and then Specification.
Managing Tasks
Once a project has been defined, you can enter the tasks to be executed. You have two possibilities for this:
- click the button
Tasksto the right of the project form, then click Create, - from the menu
Project > Project > Tasks, create a new task and assign it to an existing project.
Each task has one of the following states:
Draft: the task has been entered but has not yet been validated by the person who will have to do it,In Progress: you can start working on the task, hence the task is in progress,Done: task is completed,Cancelled: task work is no longer required,Pending: task is waiting for response of someone else (e.g. customer information).
A task can be assigned to a user, who then becomes responsible for closing it. But you could also leave it unassigned so that nobody specific will be responsible: various team members instead are made jointly responsible for working on tasks they have the skills for.

Tasks in Project Management
Each user manages his or her own task using the various menus available. To open the list of unclosed tasks that have been specifically assigned to you, go to the menu Project > Project > Tasks. Or to open the unassigned tasks, go to Project > Project > Tasks and then Clear the search and then click Unassigned Tasks from search filter.
Every user should create a link in their own shortcuts to the Tasks menu, because they will have to consult this menu several times a day.
The Delegation tab allows you to define links between your tasks. From Parent Tasks set the tasks that are related to this task. Use this feature to define the order in which tasks need to be accomplished, i.e. task 2 may not be executed before task 1.
Invoicing Tasks
Several methods of invoicing have already been described:
- invoicing from a sales order,
- invoicing on the basis of analytic costs (service times, expenses),
- invoicing on the basis of deliveries,
- manual invoicing.
Although invoicing tasks might appear useful, in certain situations it is best to invoice from the service or purchase orders instead. These methods of invoicing are more flexible, with various pricing levels set out in the pricelist, and different products that can be invoiced. And it is helpful to limit the number of invoicing methods in your company by extending the use of an invoicing method that you already have.
If you want to connect your Sales Order with Project tasks you should create products such as On Site Assistance and On Site Monitoring. These products should be configured with Product Type Service, a Routes Make to Order and Manufacture. Once you have set this up, Odoo ERPOnline automatically creates a task in project management When the Quotation will be Converted to Sale Order. You can even take this further by adding a default project to your product. In the Product form, on the Information tab, enter the default project to which the automatically created task (from the sales order) should be linked.
You can also change some of the order parameters, which affects the invoice:
Shipping Policy: Invoice on Order After Delivery (when the task is closed),Invoice On: Shipped Quantities (actual hours in the task).
Create the Sales Order using the product On Site Assistance with the above configuration and confirm it. You can find the task created from this sale order using the menu Project > Project > Tasks. Once you find that task, click on the specific stage e.g.:guilabel:Design. You have to manually assign the project for this task, unless you specified a default project in the Product form. When you complete the task, enter the information in the Task Work field. Then click the Done button in order to indicate to Odoo ERPOnline that this task is finished. As an example, the new task SO008:On Site Assistance generated from sales order SO008 is shown in following figure.
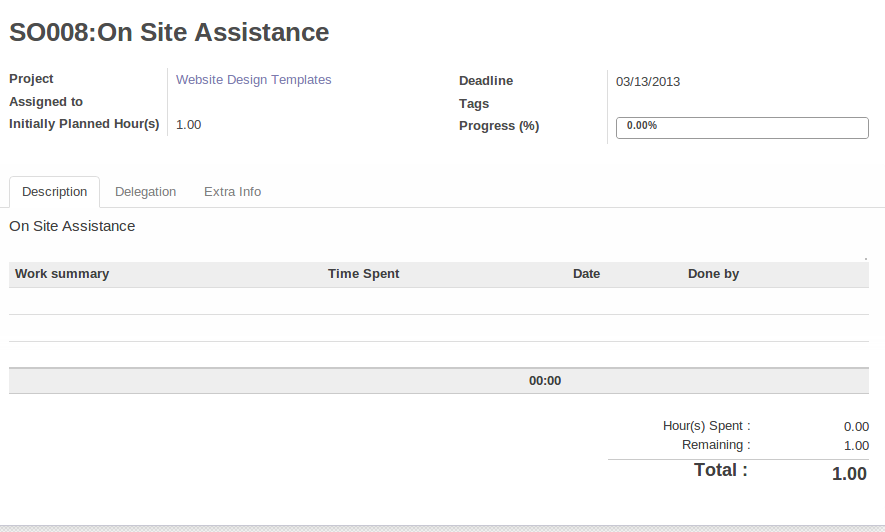
Task created from Sales Order
You need to carefully configure the analytic account related to this project. If you use the Billing tab of the project to do this, the analytic account linked to the project will automatically get the related settings.
After finishing this task, go to the menu Project > Invoicing > Invoice Tasks in order to find the list of uninvoiced tasks. Click the action Create Invoice from more button, when you want to create an invoice for this task work.
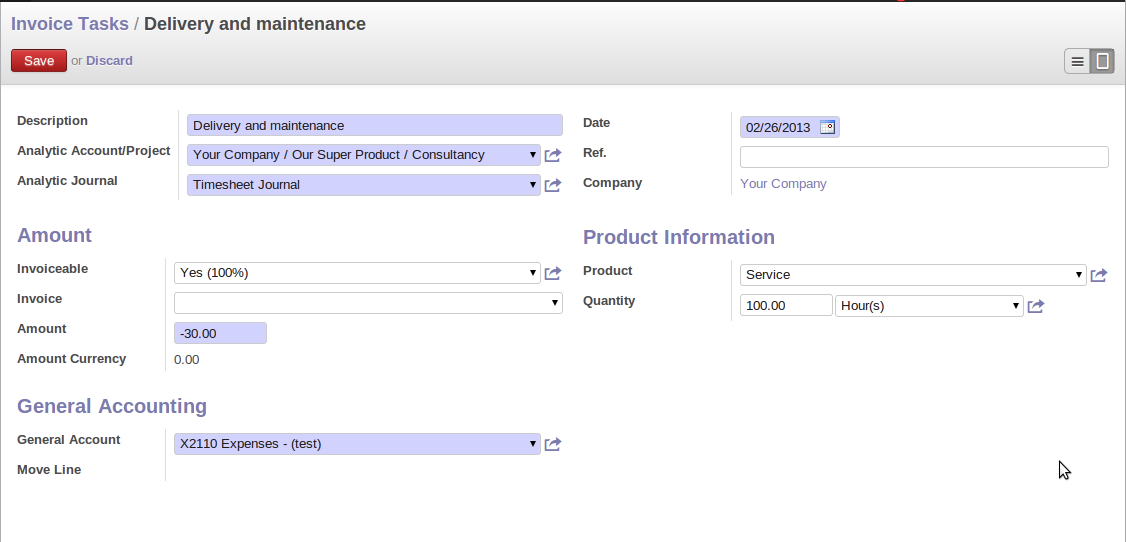
Create Invoice for Tasks Work
Priority Management
Several methods can be used for ordering tasks by their respective priorities. Odoo ERPOnline orders tasks based on a function of the following fields: Sequence, Priority, and Deadline.
Use the Sequence field on the second tab, Other Info, to plan a project made up of several tasks. In the case of an IT project, for example, where development tasks are done in a given order, the first task to do will be sequence number 1, then numbers 2, 3, 4 and so on. When you first open the list of project tasks, they are listed in their sequence order. You can simply drag and drop tasks to change their sequence.
You can use one of these three ordering methods, or combine several of them, depending on the project.
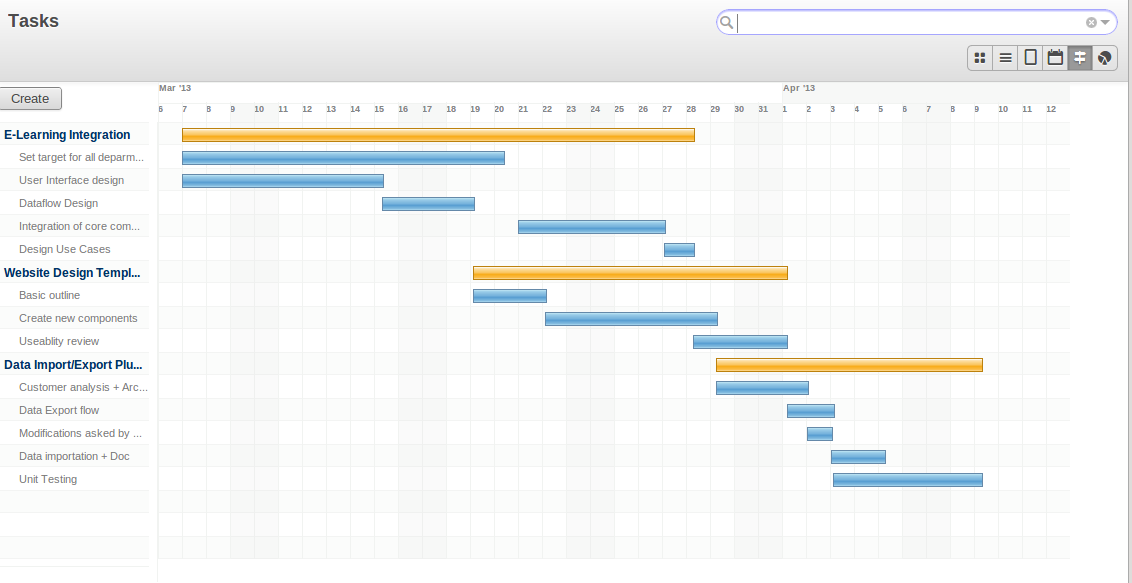
Gantt chart, calculated for earliest delivery
You can set the Working Time in the project file. If you do not specify anything, Odoo ERPOnline assumes by default that you work 8 hours a day from Monday to Sunday. Once the time is specified you can call up a project Gantt chart from Tasks. The system then calculates a project plan for earliest delivery using task ordering and the working time.
Odoo ERPOnline can give you a calendar view of the different tasks. This is all based on the deadline data and displays only tasks that have a deadline. You can then delete, create or modify tasks using drag and drop (only in web).
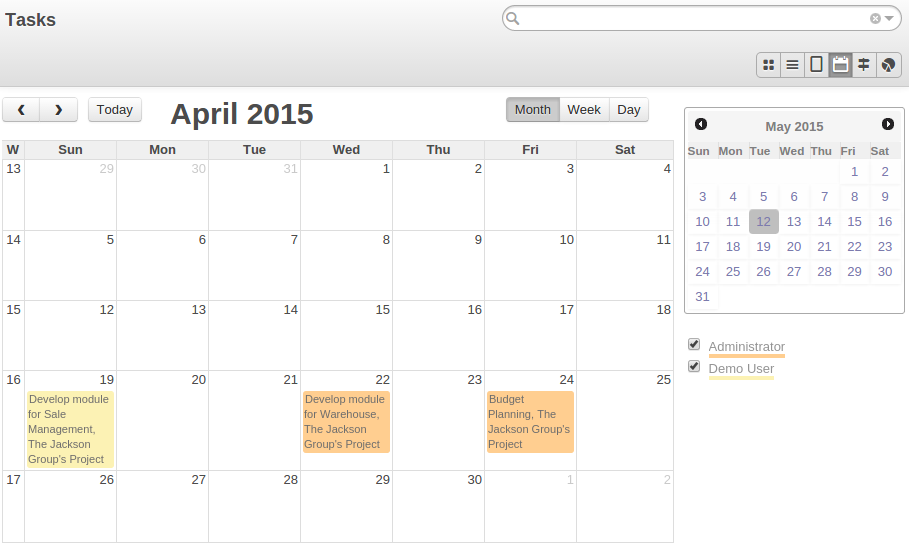
Calendar View of the System Tasks
Delegate your Tasks
To delegate a task to another user, you can just change the person Assigned to for that task. However, the system does not help you track tasks that you have delegated, such as monitoring of work done, if you do it this way.
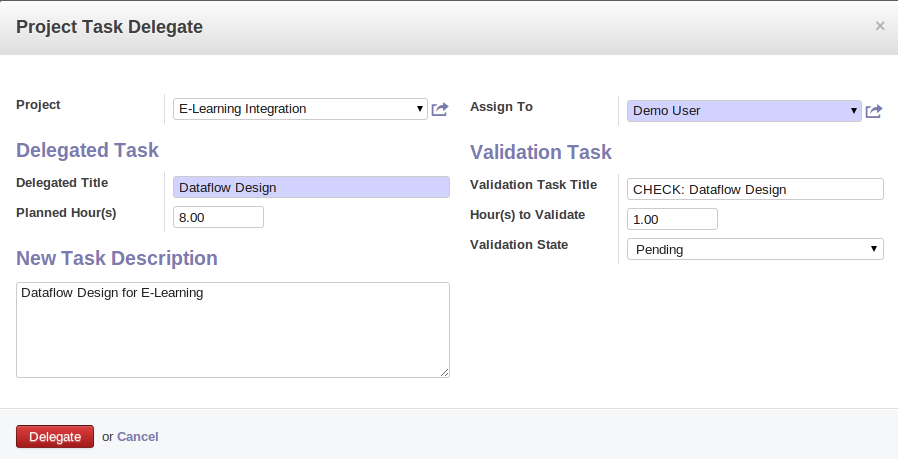
Form for Delegating a Task to Another User
Instead, you can use the Delegate button on a task.
The system enables you to modify tasks at all levels in the chain of delegation, to add additional information. A task can therefore start as a global objective and become more detailed as it is delegated down in the hierarchy.
The second tab on the task form gives you a complete history of the chain of delegation for each task. You can find a link to the parent task there, and the different tasks that have been delegated.