
Talent Acquisition
Using Odoo ERPOnline, you can efficiently manage the process of hiring new people for your organization. It is a well managed recruitment process from initial contact to hiring the applicant.
You need to install hr_recruitment module to efficiently manage the recruitment process or Go to menu Settings > Configuration > Human Resources tick Manage the recruitment process and click on apply button.

Configuration to install hr_recruitment module
The Applications form can be seen from the menu Human Resources > Recruitment > Applications.
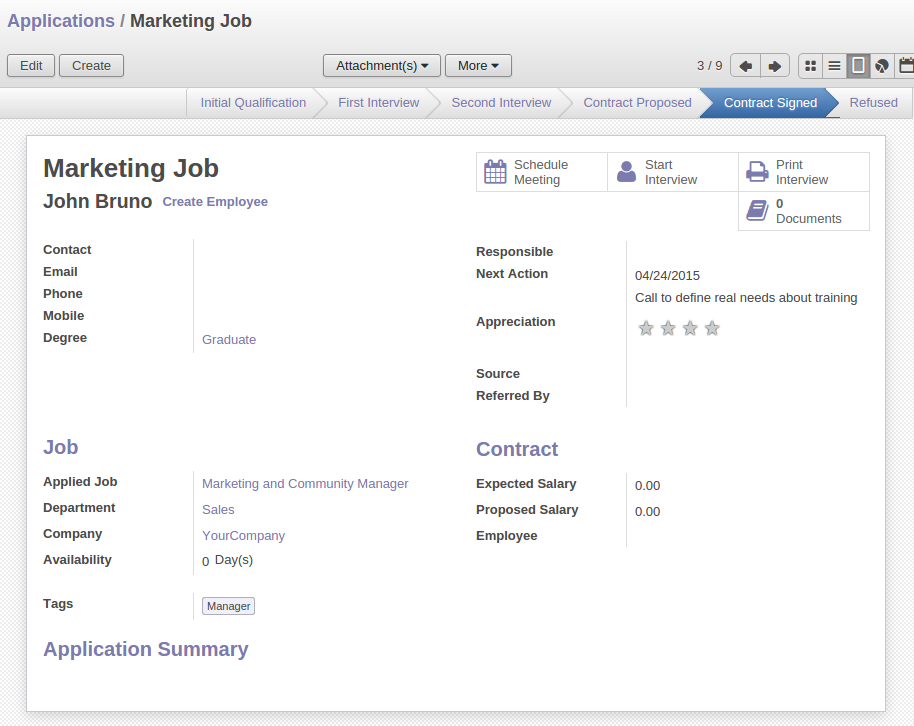
Applications recruitment form
You can manage the following information using the Applicants form:
Applicant's NameApplied JobDepartmentStage: can be Initial Qualification, First Interview, ...Responsible: Responsible person who conducts the interviewContact informationContract Data: including Availability, Expected Salary, Proposed SalaryQualification of the applicantState: reflects the actual status of the recruitment process like New, In Progress, Pending, Refused or Hired
Initially, the applicant state is New, after that it can be converted to In Progress. If the applicant is at one of the different stages like it may be in Waiting for approval by human resource department or Waiting for offer acceptance by applicant, in these cases, the applicant state should be Pending. When the status is Hired, you can find that applicant's detail from the list of employees.
The information about the Job Position can be maintained by the menu Human Resources > Configuration > Job Positions.
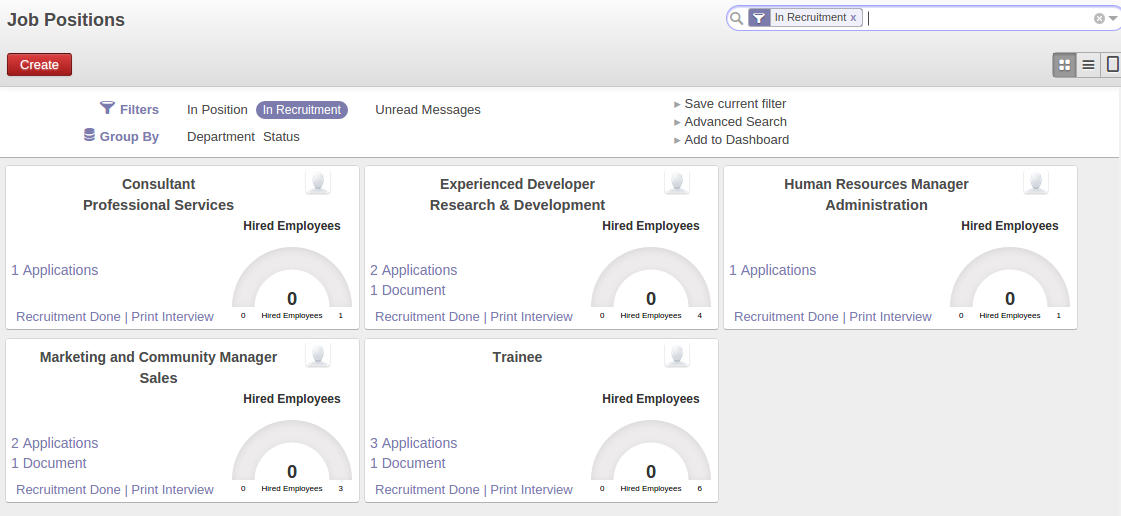
Job Positions in the organization
The key features of Odoo ERPOnline for the process of hiring new people using hr_recruitment module are:
- It manages job positions and the recruitment process.
- It is integrated with the survey module to allow you to define interviews for different jobs.
- This module is integrated with the mail gateway to automatically track emails sent to jobs@yourcompany.com.
- It is also integrated with the document management system to store and search CVs in your CV base.
You can analyse data of recruitment process through the menu Reporting > Human Resources > Recruitment Analysis.
Create applicants automatically
You have seen how to create new applicants from the Applicants form. You can also configure your email server in OpenERP to create new applicants based on incoming mails. For example, if you have an e-mail ID jobs@yourcompany.com, you can configure it such that all emails received at this ID automatically generate new job applicants.
For this, you have to install the fetchmail module from module list and For configuring Fetch Emails Go to menu Settings > Configuration > Human Resources tick Create applicants from an incoming email account and click on configure button or Navigate to Setting ‣ Technical ‣ Email ‣ Incoming Mail Servers and click Create. Supply the following information in the Email Servers form:
Name: A name for the server configuration.Server Type: Either POP Server or IMAP Server.Keep Attachment: Set to True, to be able to retrieve attachments like CVs, cover letters, etc.Server: Server name.Port: Server port.User Name: The username on this e-mail server.Password: The password for access to this e-mail account.Model: The object model for which you wish to generate a record. Select Applicant (hr.applicant) in this case.
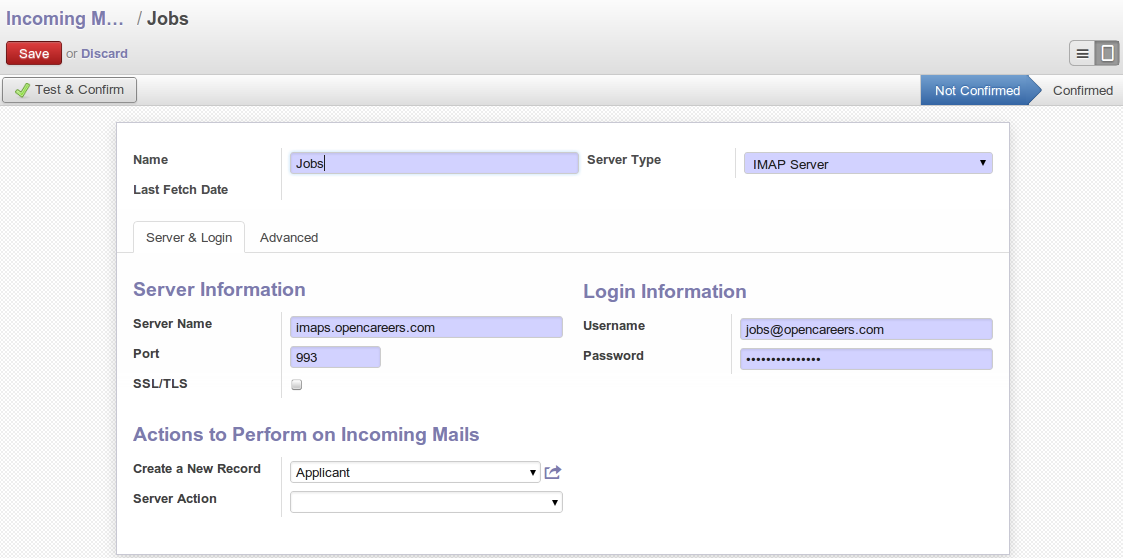
Configuring an e-mail server
After configuring your server, click the Test & Confirm button to enable this configuration and click on Fetch Now button to start receiving e-mails.
Whenever you receive a new e-mail at the configured e-mail address, a new applicant record is created having the same subject name as the e-mail subject. The applicants e-mail details are stored too, for future correspondence. You can add more details to this job application. You can view these newly created applicants from Human Resources > Recruitment > Applications. In the figure Job applicants automatically created from e-mails, the Initial Qualification applicants have been created automatically from received e-mails.
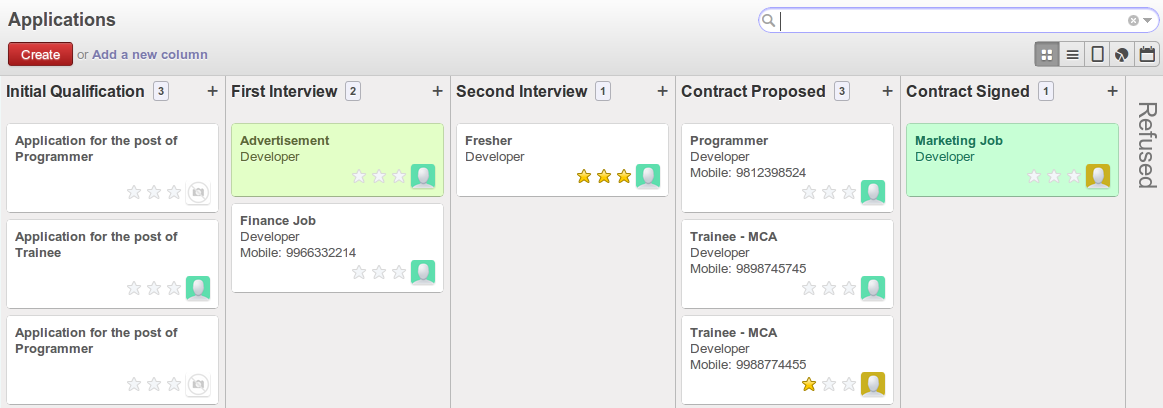
Job applicants automatically created from e-mails
Because you have configured your server to add attachments, if an incoming applicant e-mail contains attachments, it will be linked to the corresponding applicant record. You can find it in the Attachments section at the top of the applicant form. You can click on the attachment name to open it.
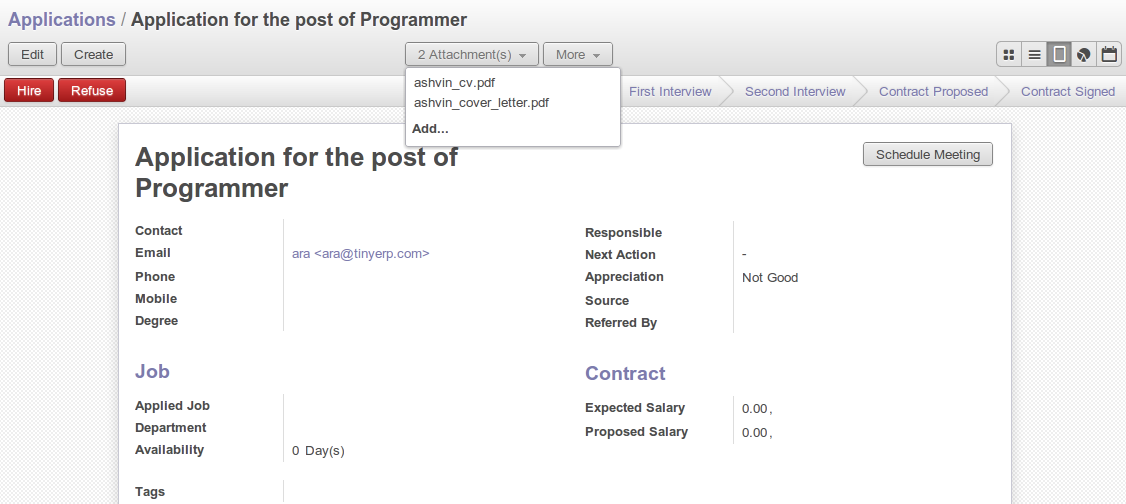
Applicant form with its corresponding attachments
Define stages to track the progress
Rarely will a recruitment process end after just a single meeting or a phone call. It is in fact a string of stages through which a recruitment progresses in order to bear a favourable outcome. You can define the stages which a recruitment process would undergo. Use the menu Human Resources > Configuration > Recruitment > Stages to define various stages.
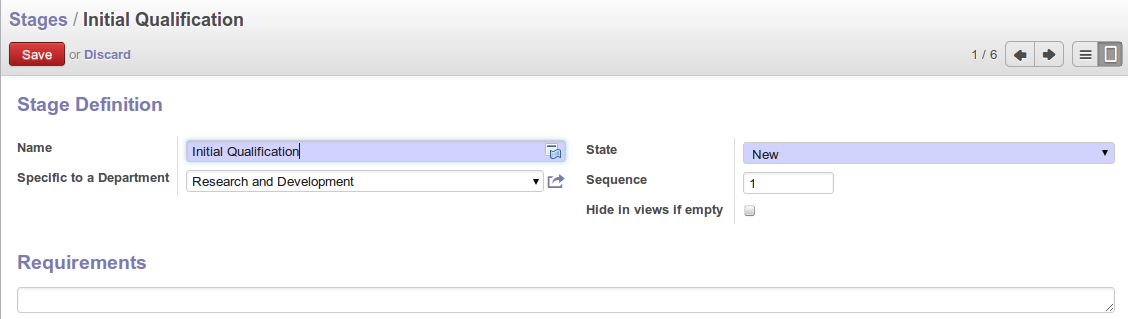
Defining recruitment stages
You must give the stage a Name. Use the Sequence field to give a sequence order when displaying a list of stages. You may also associate the stage with a Department and State. The stages are now conveniently placed on the top right hand of each of Applications. Using this, you can qualify an ongoing recruitment process from one stage to another by just one click.
Define next action and next action dates
The Next Action Date and Next Action fields on the Applicants form let you define an action you would like to initiate on a given date. It serves as a reminder to the recruitment officer regarding what step he must take next and on which date.
E-mail communication with the applicant
you can send message or email easily. OpenChatter provides a simple communication tool to discuss amongst colleagues or external contacts, either with an individual or with a group.
You can see it, as 2 links below the applicants form (Send a message or Log a note) and you can send message or mail via that chatter. If you click on Send a message , you can see following figure
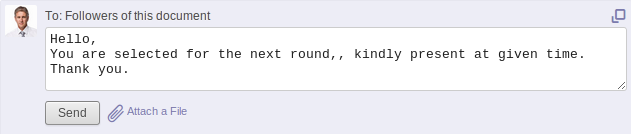
Send a message to the applicant
Here too , You may also add attachments through the OpenChatter. Click Send button to send the message.
And for send a mail throgh Openchatter , the full window seems like follow:
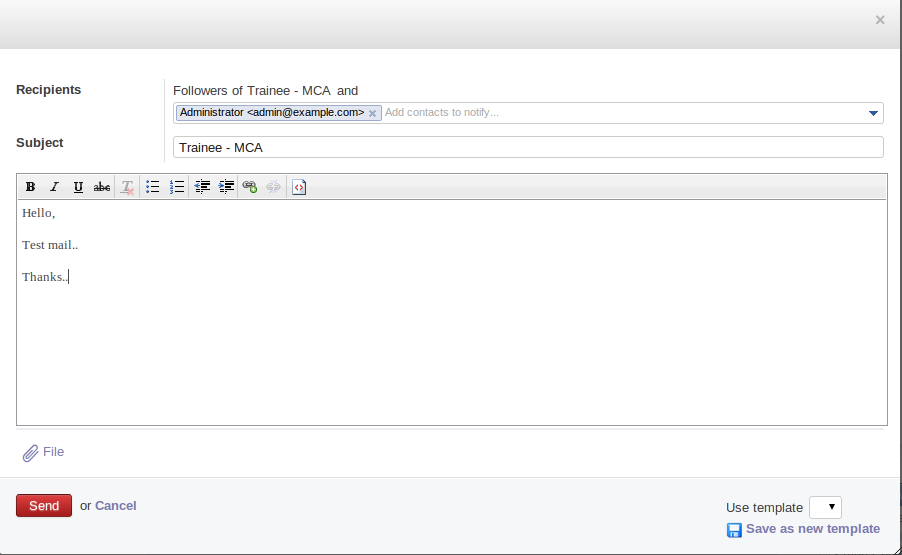
Send an e-mail to the applicant
You can also schedule meetings with an applicant. To do this, click the Schedule Meeting button on the Applicants form. A calendar of meetings opens in the Meetings form. Here, you click an empty area on a date for which you wish to schedule the meeting. It shows as follow:
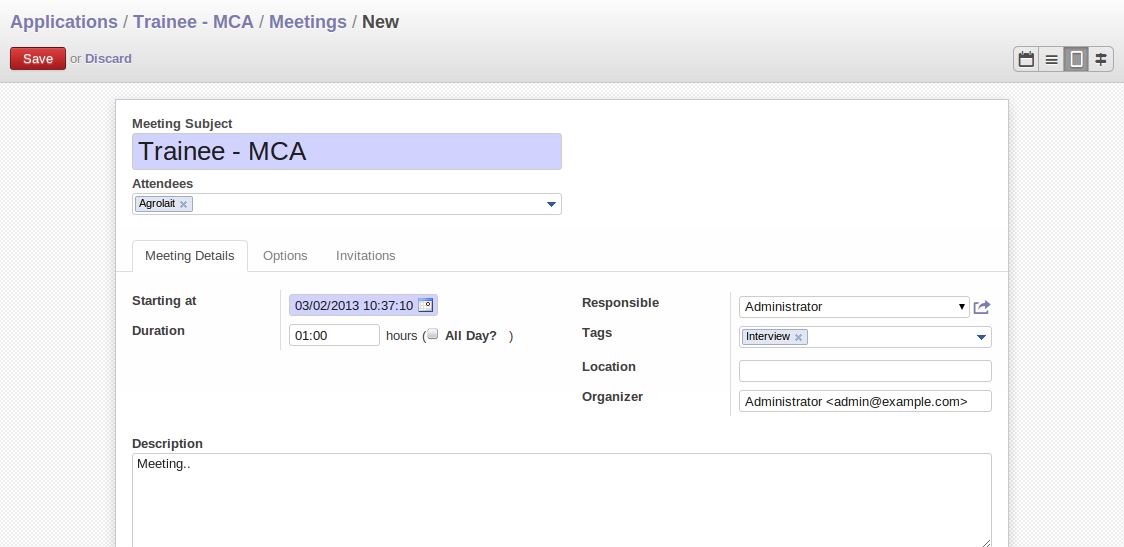
Schedule a meeting with an applicant
You can manage the following details from this form:
Start Date: The scheduled start date and time.Duration: The duration of the meeting in hours.Location: Location of the meeting.Reminder: If you want to be reminded about the meeting, you can select an alarm time before the event occurs.Description: You may specify the agenda of the meeting here.
On the Invitation Detail tab, you also have the choice to invite people for the meeting. Click Save once you have entered the necessary details. You can then see the meeting appear in the calendar as shown below:
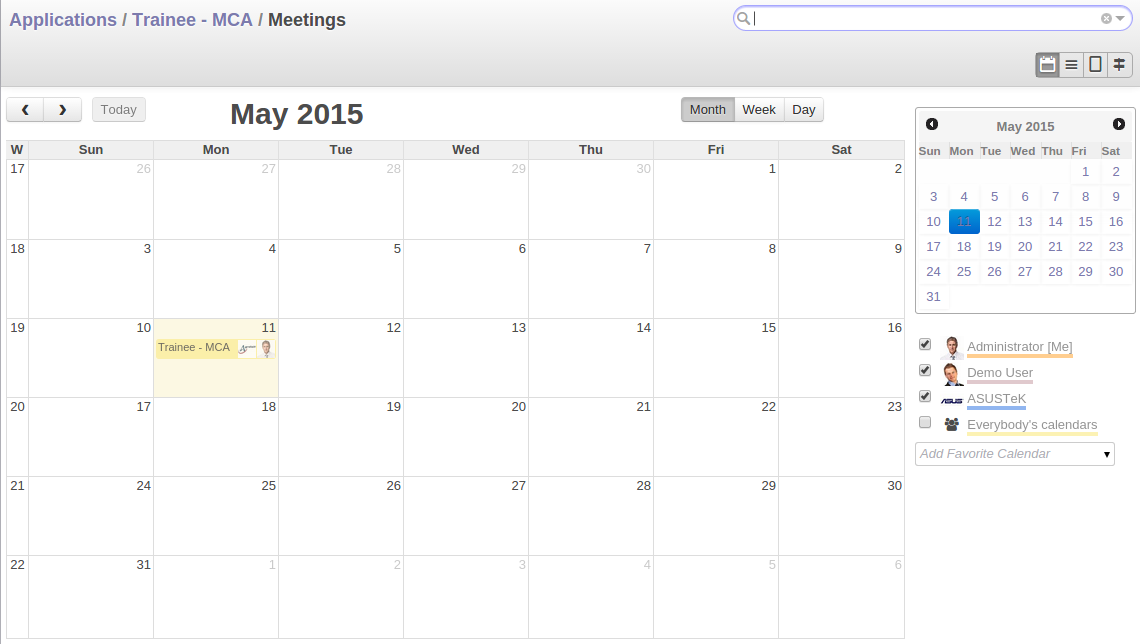
The scheduled meeting "Trainee - MCA" with the applicant as seen in the calendar
You can track and edit your meetings with applicants from the menu Messaging > Organizer > Calendar. By default, you will see the month-wise calendar view of meetings.
Fill questionnaires for each applicant
You can use questionnaires as a tool to interview a job applicant. To be able to use questionnaires for a job applicant you must first define one through Marketing > Surveys > Surveys. Click Create to open a new survey form. You may enter the Survey Title and the Responsible user for the survey.
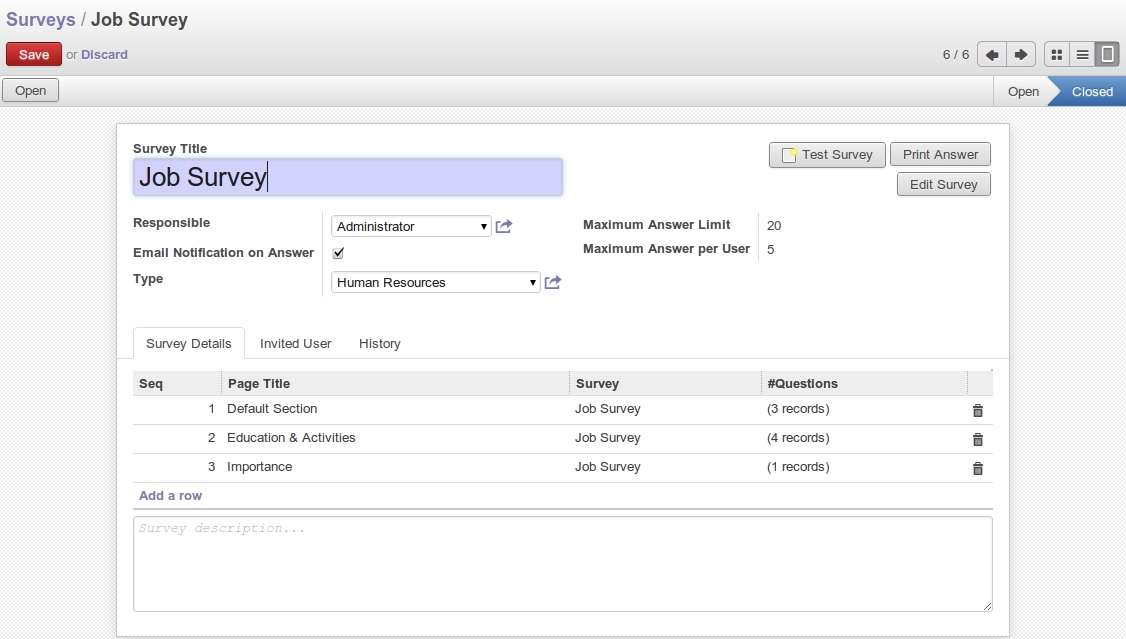
The survey form
A survey may have multiple pages. Each page may contain multiple questions and each question may have multiple answers. Different users may give different answers to the questions. You can define these in the Survey tab of the form. When you have entered the necessary details in the form, click Save. Since you will use this survey in a job interview, click the Open button to change the survey's state from Draft to Open.
Then, go to Human Resources > Configuration > Job Positions and select the job position that the applicant has applied for, or create a new job position. In the Interview Form field of the Job Positions form, enter the name of the survey you have just created, thus linking a questionnaire with this job profile and making it available for use during the interview.
You can now open the form of the applicant whose interview you wish to initiate. If an Applied Job is specified to which a survey is linked, the Start Interview button becomes accessible. Click it to initiate the survey, and fill in the applicant's response as you proceed. After the questionnaire has been completed, you can click the Print Interview button on the Applicants form to view the applicant's response in a PDF file.
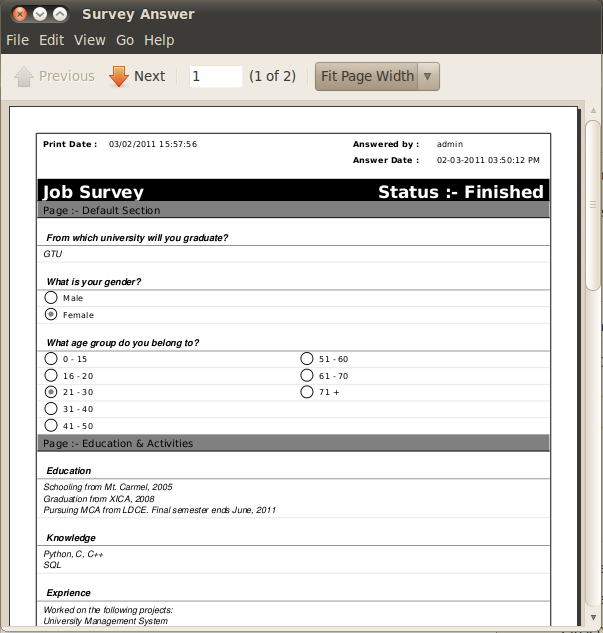
The applicant's response in a PDF file